
Written By Colleen Coleman of CMC Design Studio LLC
Photos by Randall Perry Photography
[From the 2025 Home & Garden Magazine]
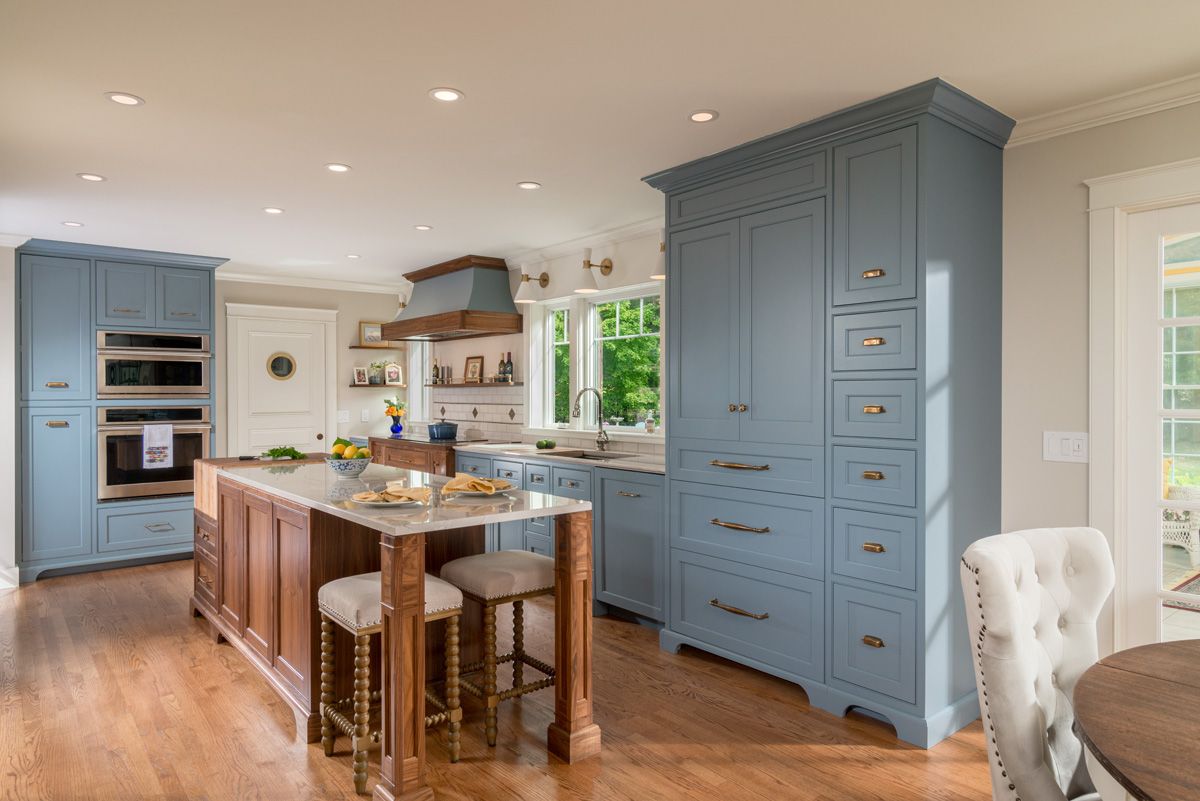
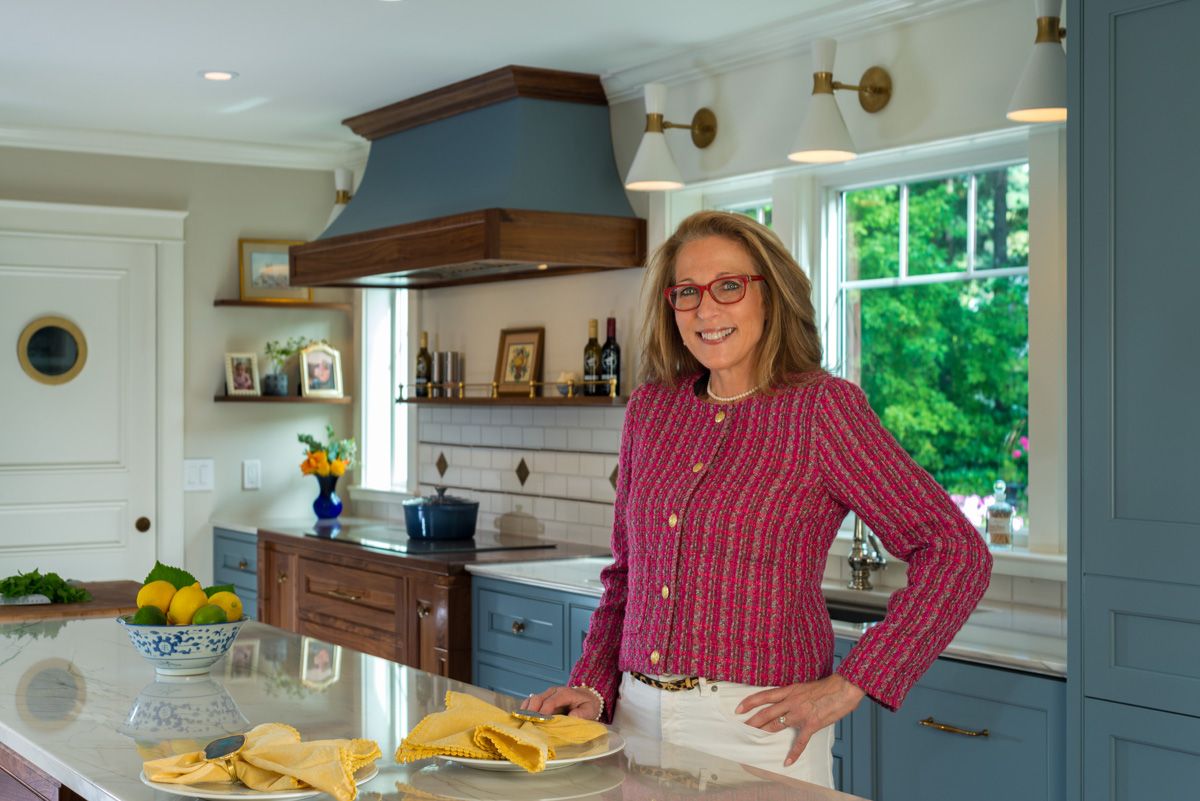
Well, I finally got past being the shoemaker who wore the worst shoes in town! As a high-end interior designer, who creates National Award-Winning Kitchens of all sizes for others, I have finally stopped long enough to breathe and create a space that both showcases my craft as a custom cabinet designer and gives my family a highly functional kitchen to gather in and make new memories!
Where to start was the hardest part. When you’re the designer and the client, believe it or not, it’s hard to separate the two. My dream kitchen was in my head, but my designer kept telling me it needed to be refined. I actually had to turn off my designer mode, pull out my client questionnaire, and sit with my husband and complete it as all my clients do. With that, I had the spring-board to start the design process as an interior designer…not a client!
Did I surprise myself? You bet I did! I would have never thought of this layout or even chosen this sink! But when I stepped back, there it was! And we love it!...Let me show you around my new CMC Showroom and Personal Kitchen!
All my designs, including new home construction, are all sketched in 3D...meaning, you walk virtually into and through your home throughout the entire process. Tweaking and making changes effortlessly because you can see those changes right in front of you, including the interior of every drawer...All before construction starts! My clients love it...and so did I! One of the challenges to our kitchen was that it was long and narrow. So, I used this to our advantage by adding more windows. Taking in the view of our private backyard and eliminating all the wall cabinets. This allowed the kitchen to feel more expansive by bringing the outdoors in and increased the amount of natural sunlight!
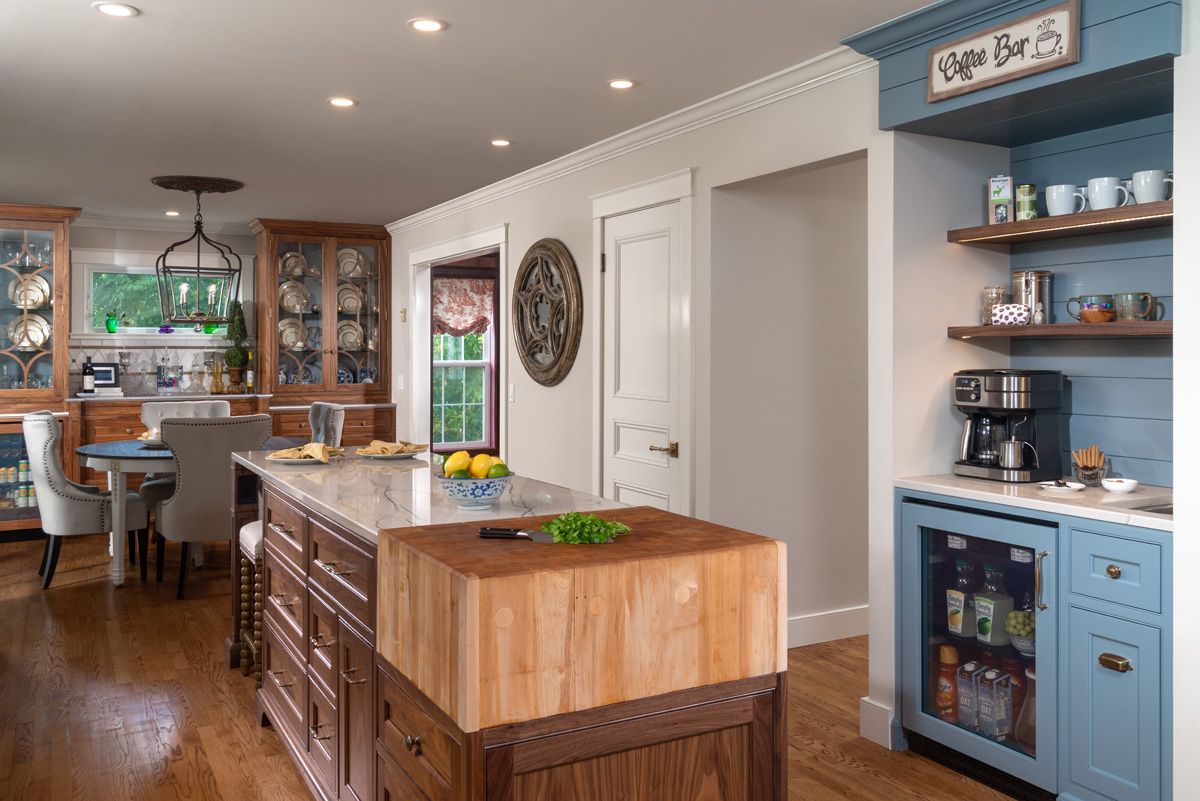
Beginning with the old refrigerator location, this 39” wide nook was going to find new life as a coffee bar. All things breakfast can be found here from coffee mugs & creamers to fruit, yogurt and juices...all within reach with a designated beverage refrigerator! It turns out, this is everyone’s favorite part of the new kitchen! Even my newest clients who toured our showroom asked to have a coffee bar in their design! To keep the space open, we opted for floating walnut shelves and a blue painted nickel-gap backsplash that soars to the ceiling to announce... “Coffee Bar”!
The old desk in our kitchen – which I never cared for – became a pantry with wall ovens, so I could bake without all the bending over. The full size and 5-in-1 ovens make cooking a breeze with the majority of preset temperatures and cooking times pre-programed…It’s like we’re eating out every night! Plus, this offers me the opportunity to show clients how investing in new appliances can change the efficiency of their kitchen and lifestyle! The full height pullout pantries to the left of the wall ovens saved me from running up and down the stairs from the basement for cooking items as my old kitchen had very little functional storage. These are some of my favorite cabinets to offer clients so it was important that they were part of the showroom design as well. Additional storage above the wall ovens helps keep high calorie goodies at bay while a drawer-in-drawer below houses all the cookware needed within easy reach!
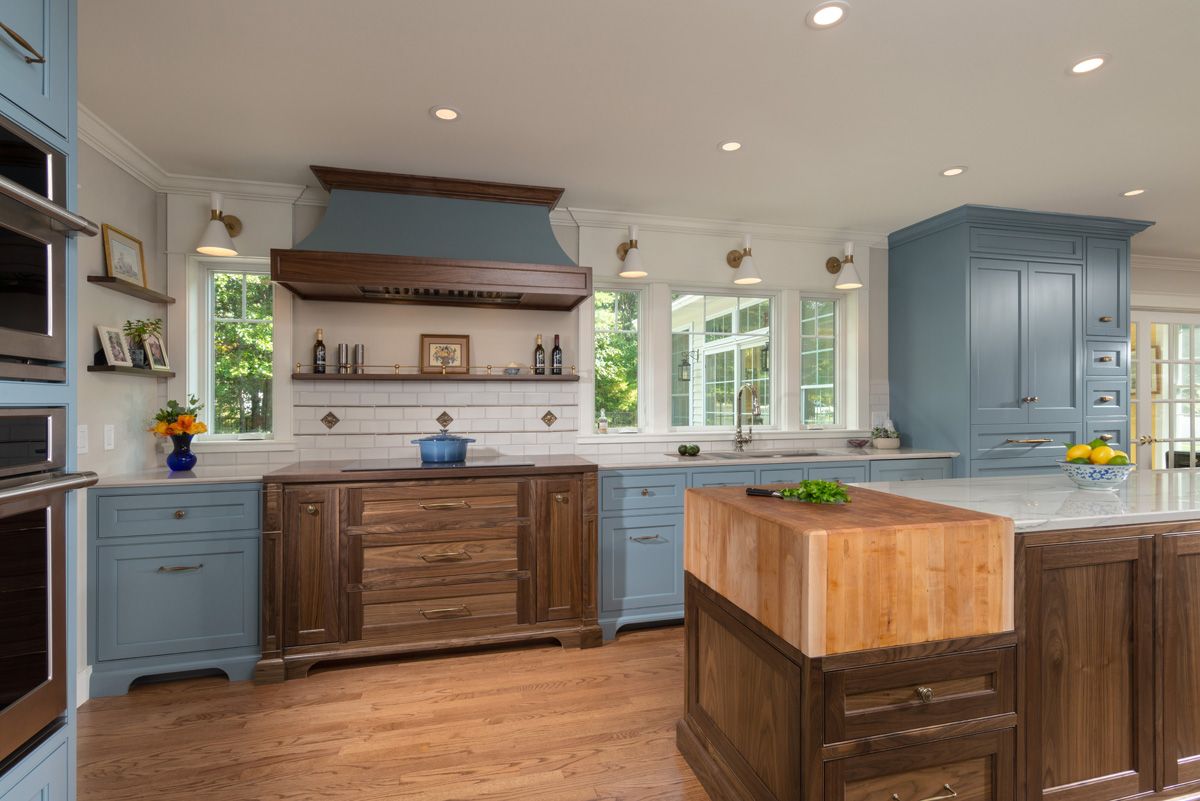
Now for the long wall which spans the kitchen to the sunroom. Originally, the design called for an entire wall of windows but we ran into too many key pipes from the second floor that I added back a cooktop hood in lieu of the downdraft originally specified. My disappointment quickly turned to extreme joy when my “designer” crafted a dramatic hood that took center stage and balanced the large refrigerator cabinet at the other end of the window. Word of advice as client and designer…never fret when your plans need to be adjusted…many times there’s something better in the wake!
Below the contoured hood with walnut trim rests a walnut cooking cabinet boasting three large drawers for cooking utensils, pots, pans and two pullout units to house seasonings, oils and more! Once the cooking begins, I’m surrounded by all I need to stay focused on cooking! After much research, I was confident to install an induction cooktop on a wood surface. The speed at which induction cooks is incredible…and…because the surface does not get hot in and of itself, I can clean up messes as I cook!
This walnut cabinet sits ¼” taller than the stone countertops on either side, accentuating its grain with a bit of drama as solid brass hardware makes you question if its furniture or a kitchen cabinet?? For the backsplash, it was important to showcase the work of the many craftsmen I utilize for my clients including the handmade tile from California and the hand poured bronze tiles out of Chicago. It’s a simple backsplash with lots of drama!
The shallow shelf with brass gallery rail above made for a perfect cap for the tile while also displaying my collection of Saratoga Olive Oils, seasonings and of course, garlic!
Before I go on, I can’t forget the base cabinet to the left which is an extra wide drawer to house all those extra-large pots, colanders and sheet pans! This area is just inside the door which leads to our grill, so the top drawer is strictly allocated for grilling utensils!
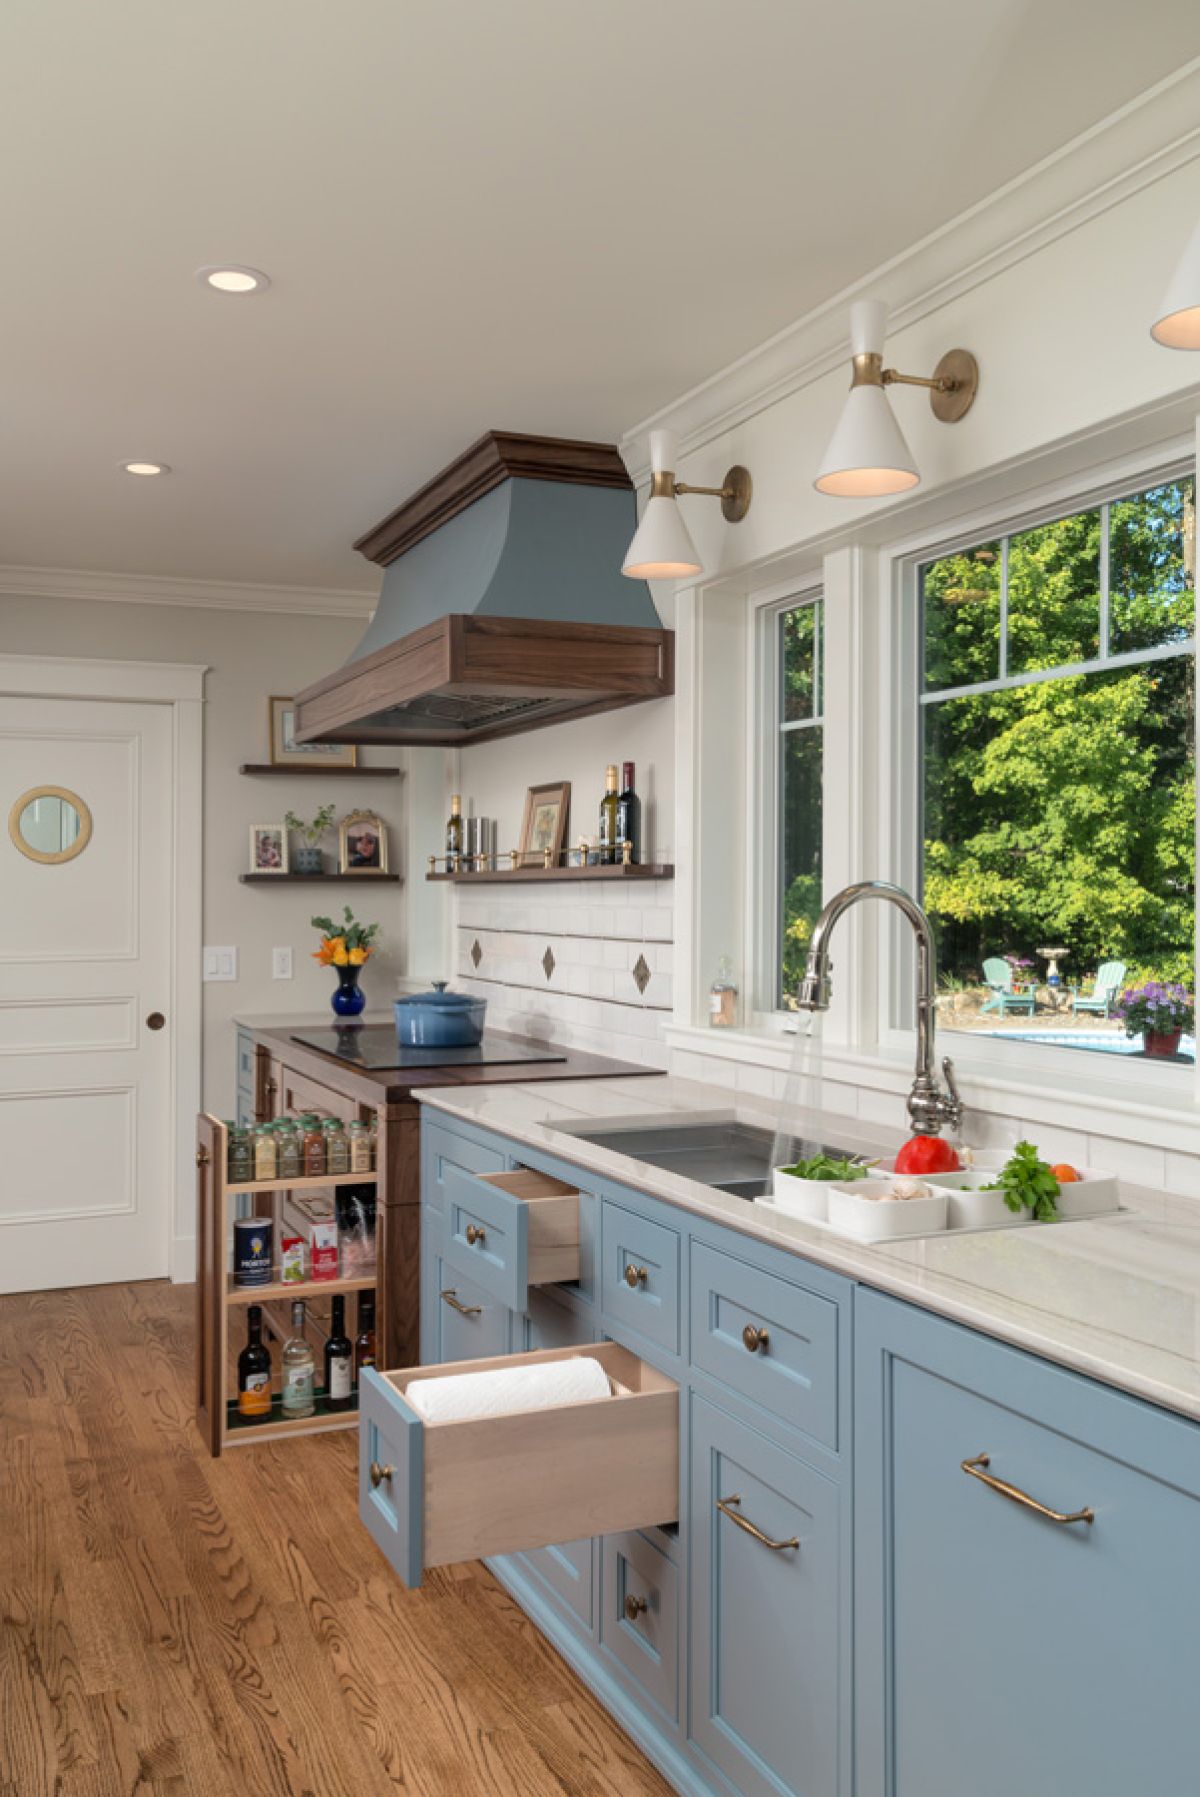
To the right of the cooktop area, it was important to capture every ounce of storage. With the prior kitchen lacking in this area, I was bent on ensuring a place for everything and then some! With a 42” stainless steel sink, you would think I lost all my upper drawers…not so! To the far left of the sink is a pullout designated for my heavy mixer and Instapot. To the far right, the dishwasher just under the sink, yes, we have two faux drawers…but the one under the sink ledge was salvaged by reducing the width of the drawer box but not the drawer face. With the sink drain to the right, I hid the water valves behind the center drawers offering more room for the disposal and dishwasher hookup to rest easily above another pullout for cleaning supplies.
Now, the refrigerator cabinet, to the far right of the sink, was one of my favorites to design. Hidden in plain sight behind faux French doors and drawers rests our souring SubZero refrigerator with dual freezer drawers below. I can’t tell you how many times people ask, “Where is your refrigerator?”…Makes my designer brain swoon! Here’s my favorite bit of concealed charm…The tall stack of drawers houses all our dishes, silverware and even has individual pockets to keep the glasses organized and less likely to bang into one another and chip the rims. The interior edge of the plate drawers is strategically dipped low to access the dishes easier while velvet lining holds the plates in place.
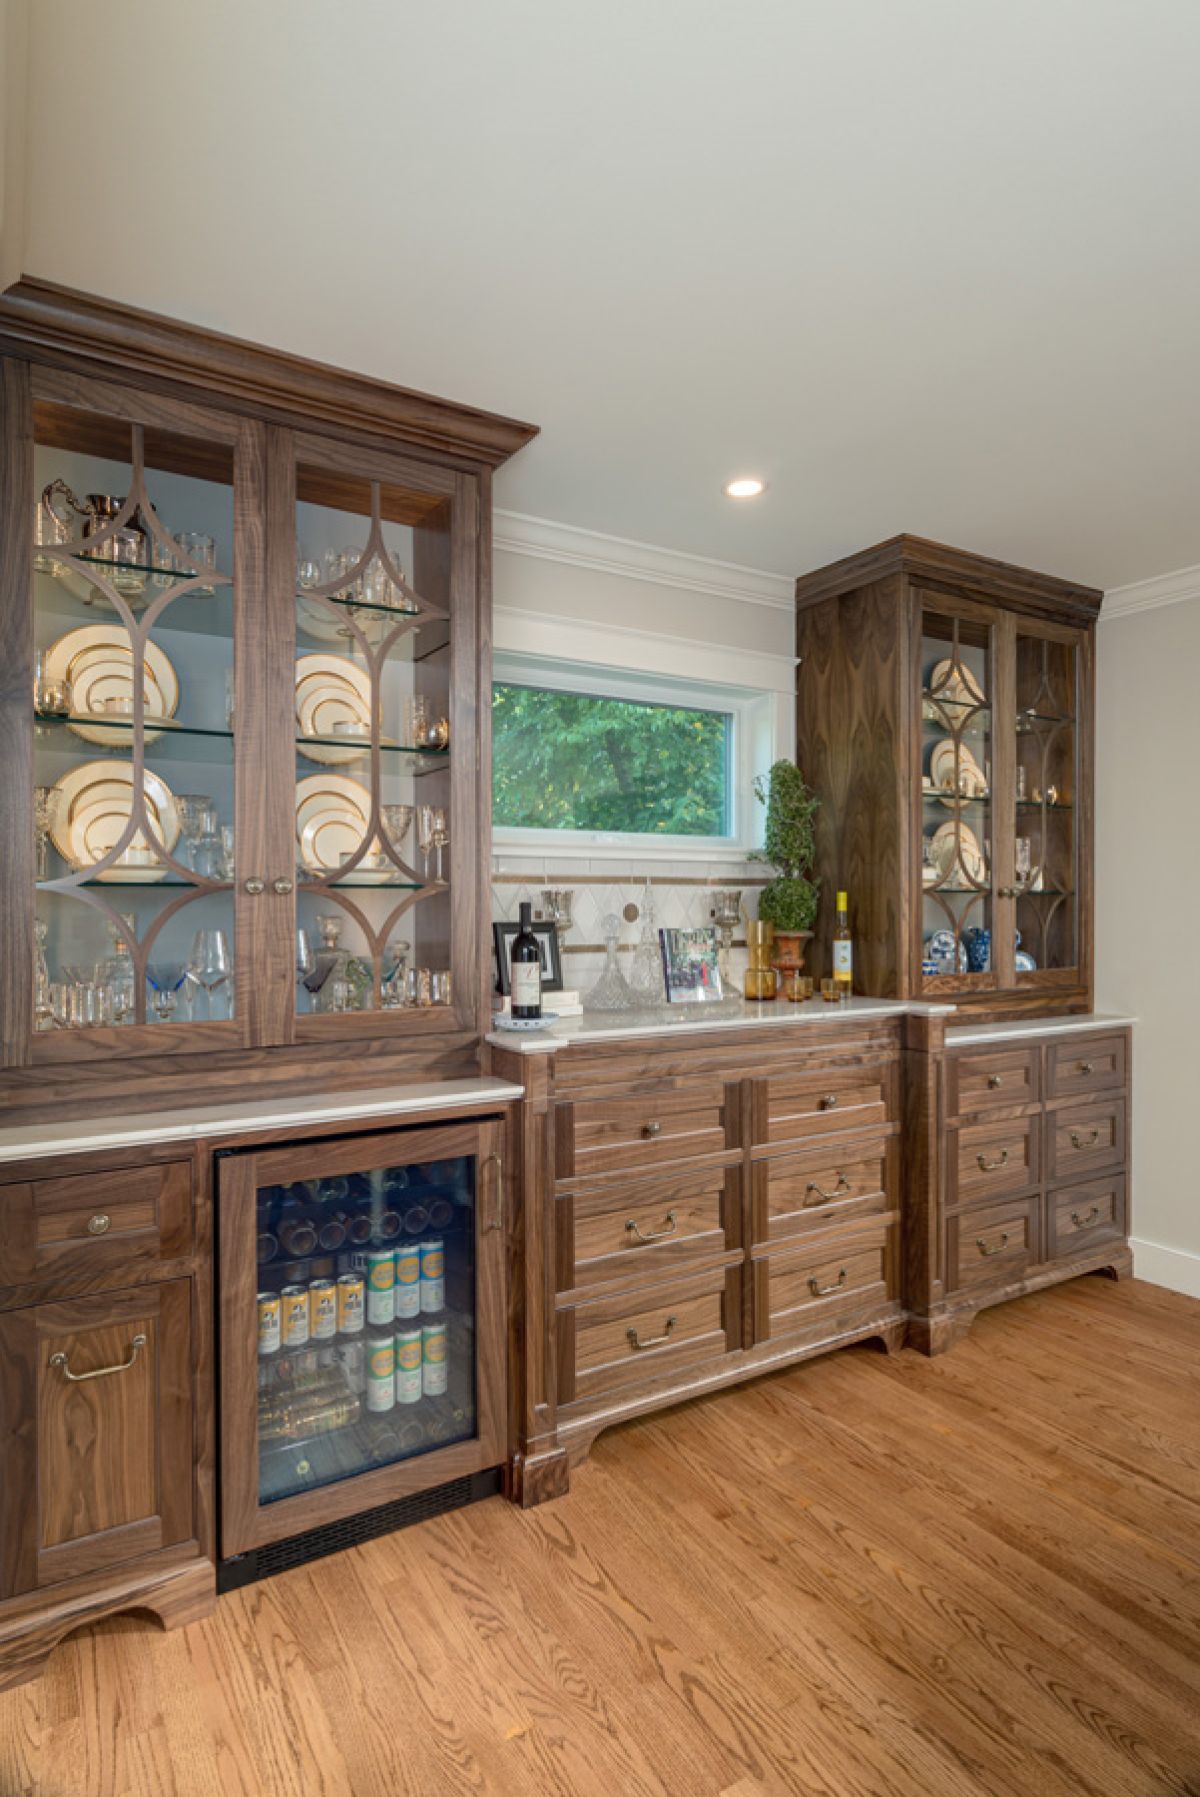
For the island, can you say drawer junkie?! That’s me! I love how drawers make all things come out in full view! As you get older, this simple change from a basic base cabinet to drawers is priceless! Here, we’re able to show large drawers, extra deep, and divided within, for best organization and functionality. When I design, each client has a road map to where all things will be put away before we even start to craft their cabinets! No guessing if things will fit…they will! Tupperware and service plates, zip bags and secondary utensils. Closer to the butcher block, these drawers carry the bulk of highly used utensils, knives and cutting boards below. To top it off, even a full-sized food processor and all its parts finds a place to rest between uses.
Often, we have special requests from clients to reuse sentimental pieces. In our case, my husband’s only desire for the kitchen was to incorporate his father’s butcher block into the island. With the skillful hand of Joe Meunier, of Meunier Woodworks in Granville NY, My Cabinet Craftsman Extraordinaire for all my projects, he managed to take this well used butcher block and bring it back to life…fitting ever so perfectly at one end of our 9 ½’ island. It’s like having a little piece of Pops with us every time we prep our meals!
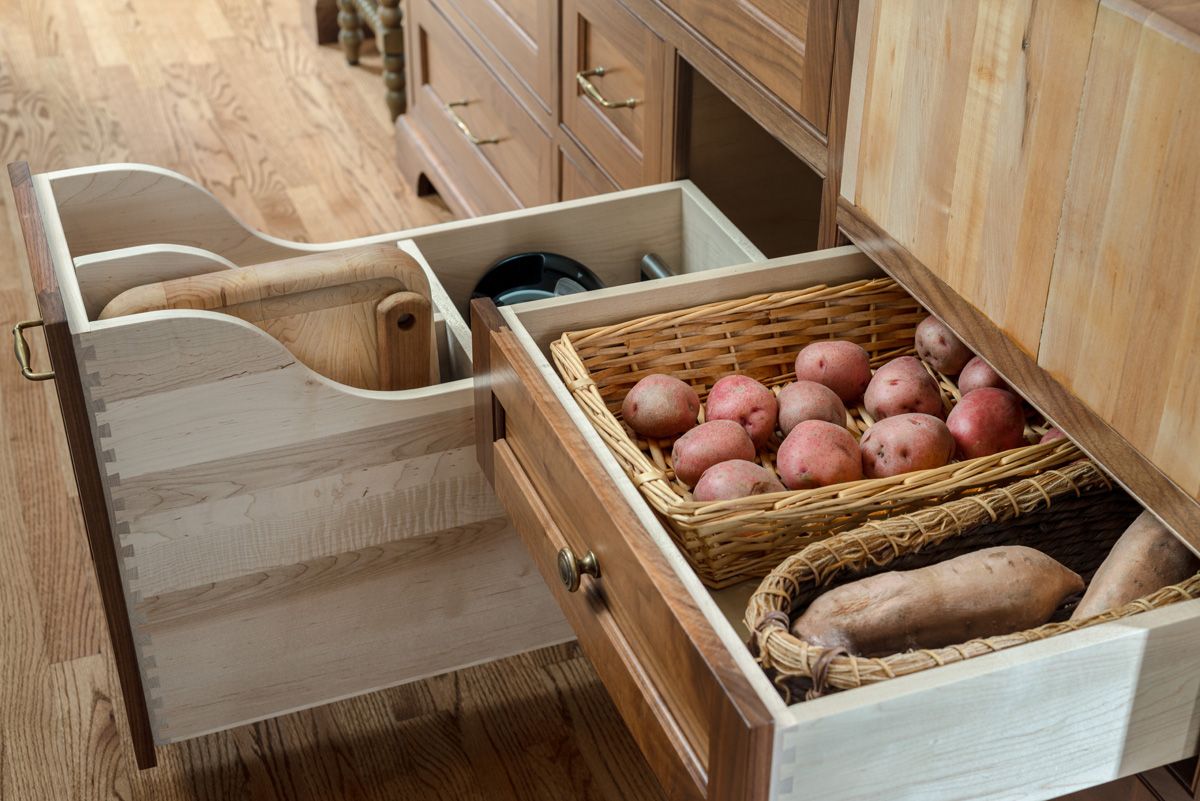
For me, my sentimental heart for antiquities wanted to keep our hand-me-down display cabinet, affectionately called “The Monster” (you’ll have to ask me personally to explain that one!) Alas, I had to let it go…but my “designer” was inspired by its door muttons. So, for the dining area tall glass fronted display cabinets, Joe hand crafted curved muttons to reflect a portion of those from the Monster. This ultimately led to the theme of this similar curve throughout the kitchen including the chandelier, the lights over the sink, the vent hood and even a large quatrefoil mirror! Another window was installed high between the display towers for privacy which allows the southern light to infuse our once dark dining area. Below, we greet guests with a selection of spirits from our bar including a second beverage refrigerator. The upper middle drawers display our favorite wines while others below house our countless cut glass dishes, cloth napkins and table settings…by season!
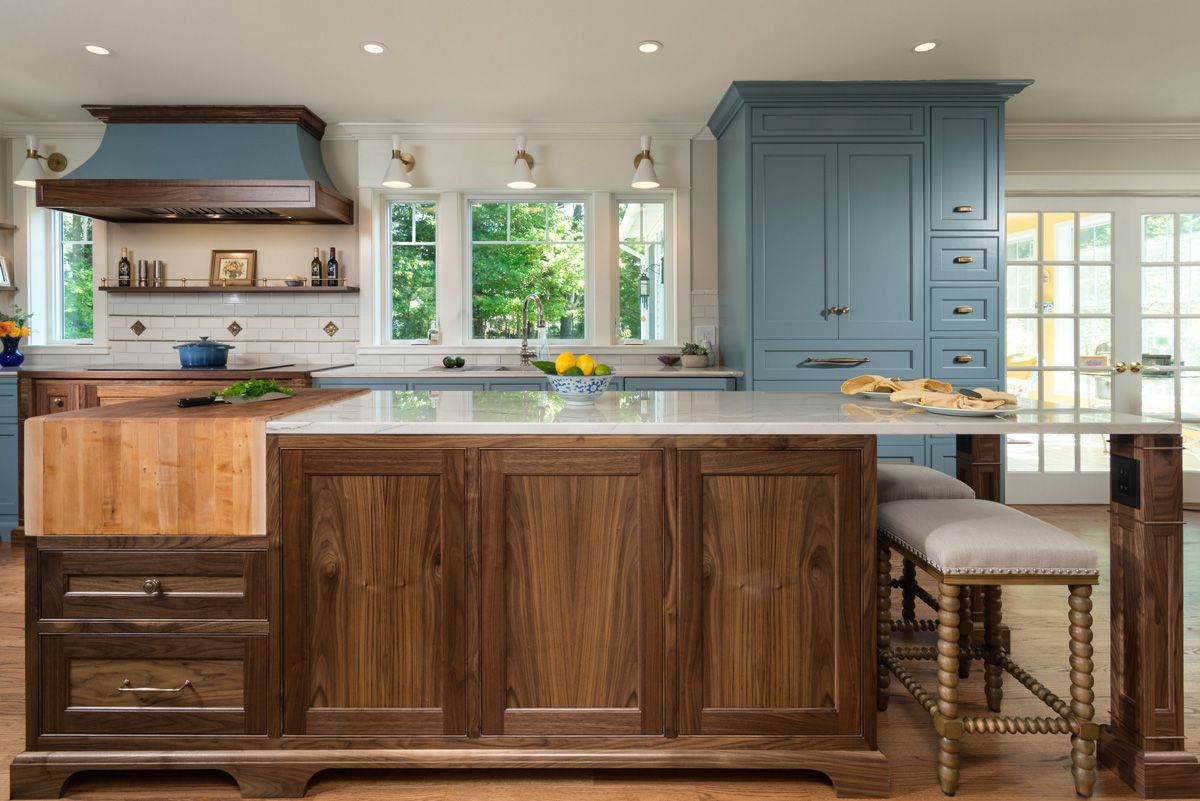
One last detail…notice there are no light fixtures over the island. With a long narrow space, the “center” of the kitchen was not the “center” of the dining area. By keeping this space open, your eye focuses on the dining area chandelier and the new window beyond as center. Besides, when you enter our home from the front door, your view immediately goes to the back yard, opening up our home visually rather than physically, enlarging the kitchen.
Don’t ever think your kitchen, or any room for that matter, is too small! Investing in high-functioning, hand crafted cabinetry can aesthetically enlarge any room and make each area work for you…so you don’t have to work so hard!